Inventory - Guide
Store virtual items in player inventory [ECON-Inventory-02]
The purpose of this guide is for game makers to setup a complete inventory experience using Beamable.
This guide includes everything needed to use the Inventory Flow Feature Prefab in the "Beamable SDK for Unity". Or watch this video.
Game Maker User Experience
During development, the game maker's user experience is as follows:
Steps
Follow these steps to get started:
Step 1. Create Inventory
First setup the Item data.
| Step | Detail |
|---|---|
| 1. Add the "Inventory Flow" Prefab | • See Inventory Flow for more info |
| 2. Open the Content Manager | • Unity → Window → Beamable → Open Content Manager |
| 3. Create "Item" content | 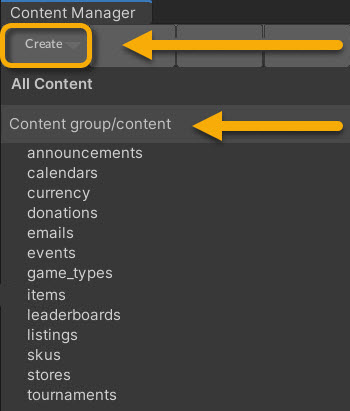 • Select the content type in the list • Press the "Create" button • Populate the content name |
| 4. Configure "Item" content | 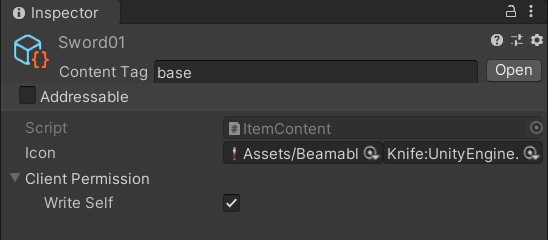 • Populate all fields Note: The icons can be set to any valid Unity’s Addressable object. |
| 5. Open Beamable Configuration Manager | • See Configuration Manager for more info |
| 6. Configure the "Inventory" | 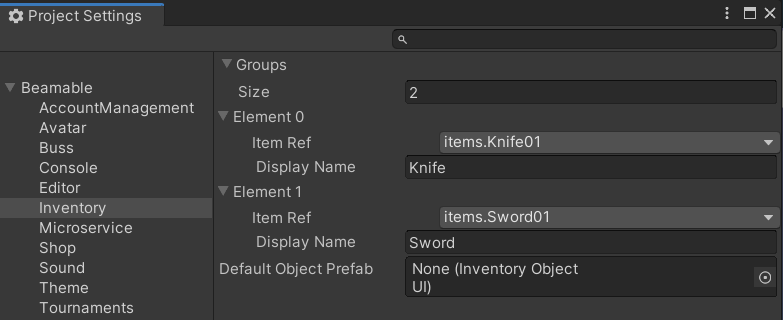 • Create 1 or more "Groups" • Populate all fields See Configuration of Item Renderers below for more info. |
| 7. Save the Unity Project | • Unity → File → Save Project Best Practice: If you are working on a team, commit to version control in this step |
| 8. Publish the content | • Press the "Publish" button in the Content Manager Window Result: The data is now setup, but the active user does not yet possess the inventory item(s). |
Step 2. Grant Inventory
Now that the Item data is setup, update the active player's Inventory.
Here the game maker will choose either 2a or 2b.
Step 2a. Grant Inventory (Portal)
| Step | Detail |
|---|---|
| 1. Locate a player's PlayerId | • See "Verify Success" on Step 1 - Getting Started |
| 2. Open the "Toolbox" Window | • Unity → Window → Beamable → Open Beamable Toolbox |
| 3. Open the "Portal" Window | • Click the "Open Portal" Button |
| 4. Navigate to desired player's Inventory | • Select the active realm • Select the "Players" tab • Search by the PlayerId from step #1 • Press the "Inventory" button • Press the "Add Item" button |
| 5. Add the item | 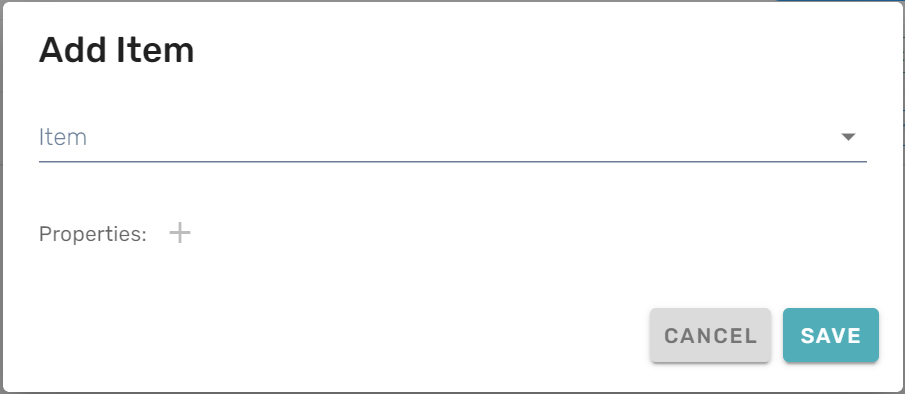 • Select the desired item in the dropdown • Press the "Save" button See Inventory below for more info. |
Step 2b. Grant Inventory (InventoryService)
| Name | Detail |
|---|---|
| 1. Add custom C# code | • See Inventory - Code for more info |
Verify Success
As an optional step, verify that everything is properly setup. Display the current player's on-screen Inventory.
| Step | Detail |
|---|---|
| 1. Run the Scene | • Unity → Edit → Play |
| 2. See the Inventory | Result: The inventory will show the active player's collection of items. |
Advanced
This section contains any advanced configuration options and workflows.
See Inventory for more info.
Configuration of Item Renderers
The Configuration Manager contains references for rendering.
- DefaultObjectPrefab - This determines the rendering of this specific Item's UI. The default value is
InventoryObjectUI.
The "Default Object Prefab" within the Beamable Configuration Manager
The defaults are provided automatically for basic functionality. Override as needed for advanced use cases. The default object's source code is viewable and serves as the starting points for creating custom overrides.
Configuration of Item Schema
Each Item has a schema of optional, custom data. This is a powerful way to send more details to your game.
Example: Perhaps, possessing an particular Item in the Inventory could unlock a special ability of flight to a superhero character.
The "Add Item" Window in the Portal
This data is defined as name/value pairs of Property Name and Value from within the Portal.
Permissions

The "Item" in the Unity Inspector
Ensure that the "Client Permission" property of Write_Self is set as true to allow this item to be granted from the client via C#. Or, set Write_Self as false as a safeguard to allow the server to be the exclusive source of items for the game.
Updated 6 months ago